Step-by-Step WPC Wall Panel Installation Guide for Exterior Projects
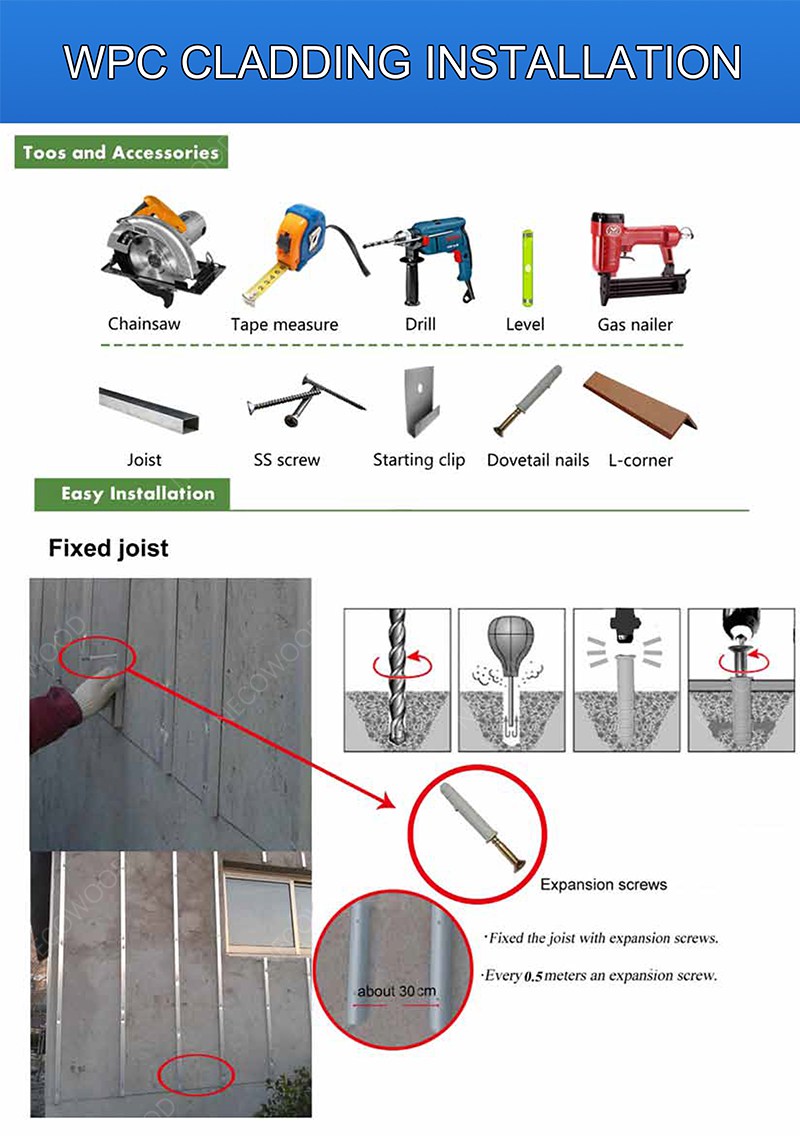
Preparation: Essential Tools & Accessories
Before beginning the installation, ensure you have a full set of accessories and safety tools to ensure efficiency and precision on-site.

Step 1: Fixing the Joist
The first and most crucial step is preparing the base. Fix the aluminum alloy joist to the wall using expansion screws. Ensure the joists are spaced approximately 30 cm apart, and secure an expansion screw every 0.5 meters to provide a sturdy foundation for the decorative wall panels.
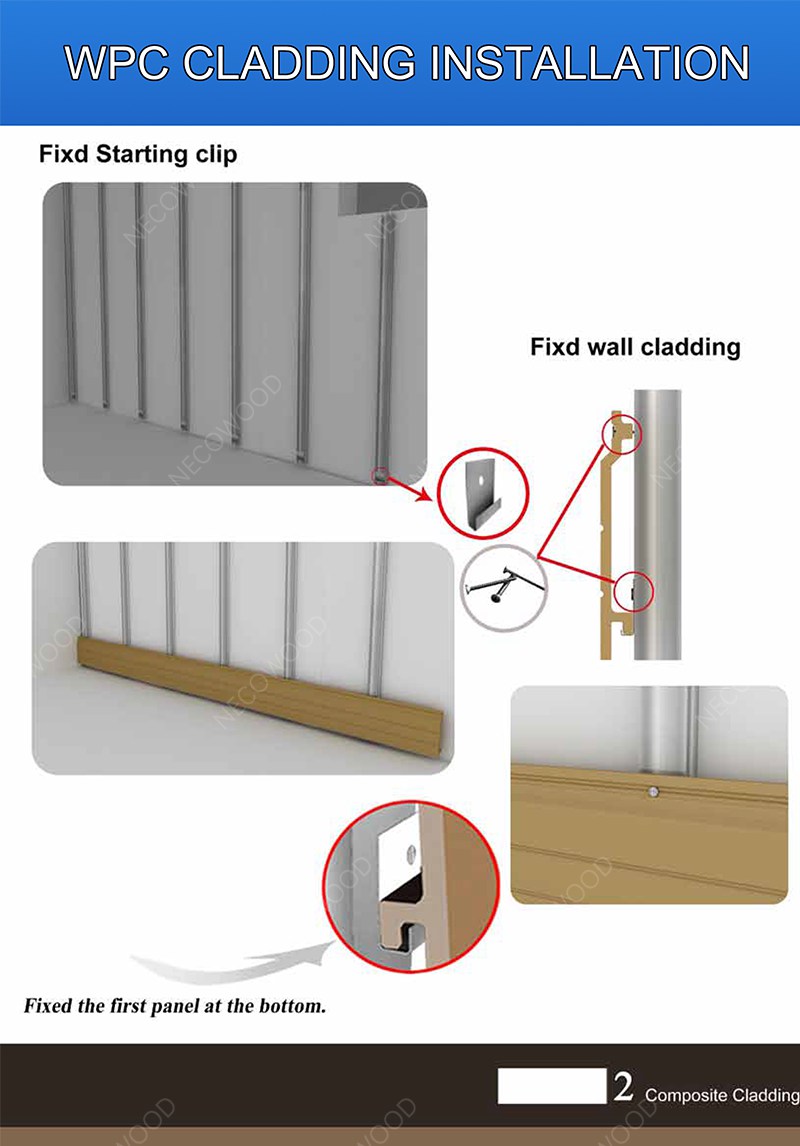
Step 2: Installing the Starting Clip
Once the frame is ready, fix the Starting Clip at the very bottom of the joists. This clip holds the first panel in place, ensuring the entire wall cladding remains level and aligned from the ground up.
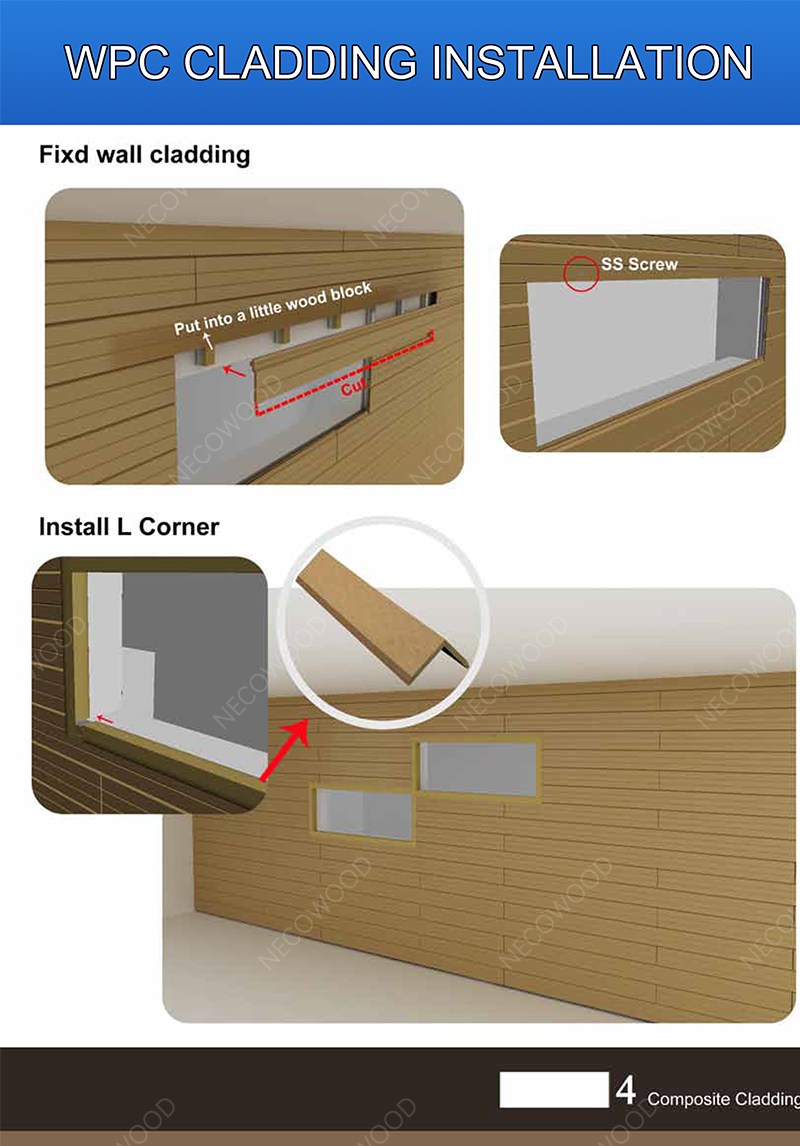
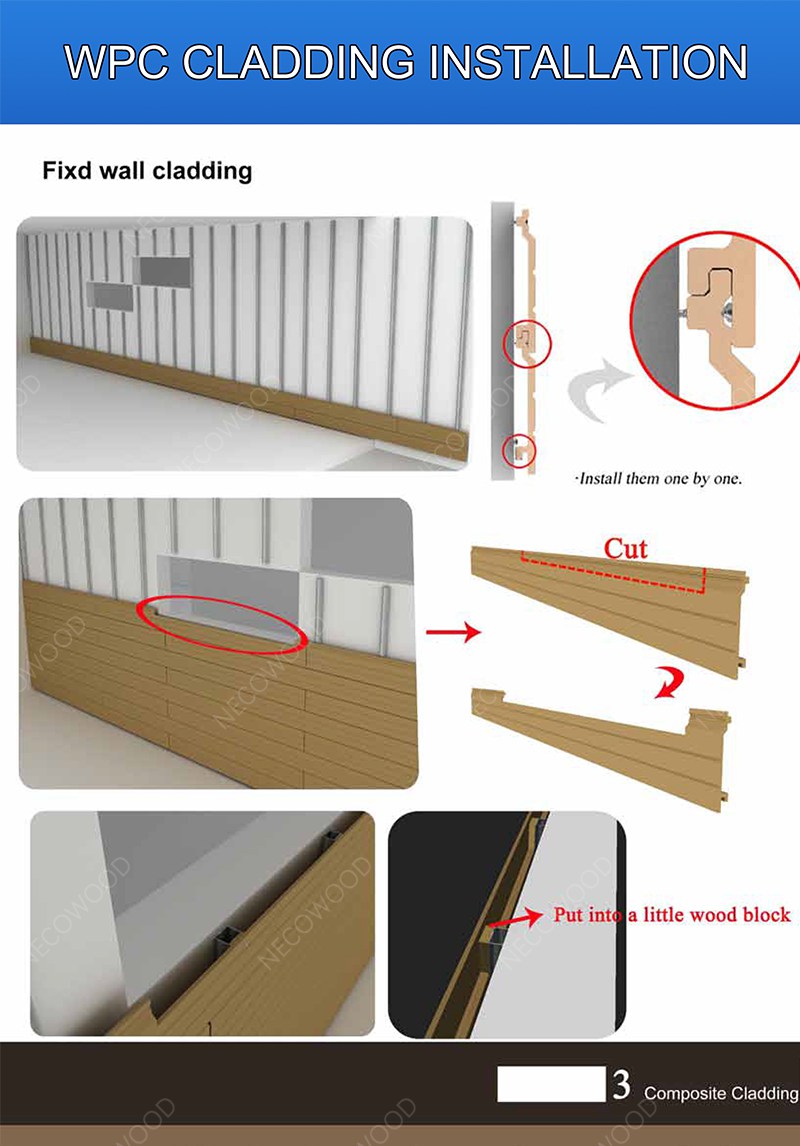
Step 3: Sequential Panel Installation
Install the wall cladding composite panels one by one using the interlocking system. Secure each panel to the joist with stainless steel screws. For areas near windows or corners, cut the panels to size and use small wood blocks for additional support where necessary.
Step 4: Finishing with L-Corner
To achieve a professional and high-end look, install the L-Corner profiles at the edges and corners. This not only covers the panel ends but also provides extra protection against the elements and impacts.